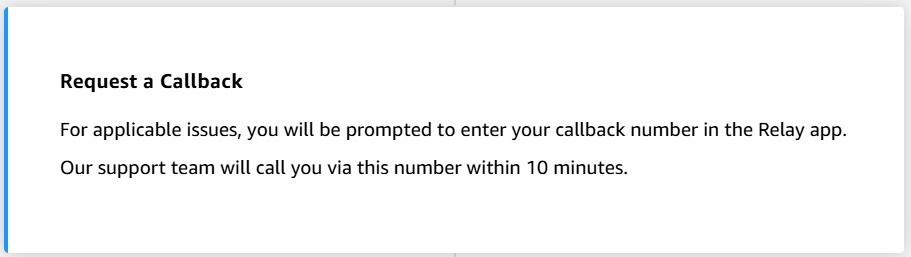
Welcome to Relay Onboarding for Drivers. This 30 minute course will help you get started on your journey as a Relay driver with confidence. In this course you’ll learn how to:
This course is divided into eight modules. At any time you can revisit lessons you’ve already completed by using the table of contents on the left side of your screen. We recommend completing this 40 minute course at one time. However, if you pause, your progress is saved between sessions.
Before you begin hauling loads with Relay, there are a few essential tasks you’ll need to complete first. Let’s go through these tasks to ensure you are set up for success for your first load.
Your Relay account is your gateway to accessing load assignments and managing work. As you prepare to setup your account you’ll need to keep these two things in mind:
Keeping your account safe starts by setting up your account correctly. This part of the course will walk you through what you need to know to get your Relay account up and running.
These four tips below will help secure your account.
Setting yourself up for success also means having the right equipment and documentation ready. Let’s review what you need before accepting your first load. We’ll cover the following two topics:
Topic 1: Equipment and Documentation Preparation
First, let’s talk about preparing your equipment and documentation for verification.
You already know you’ll need a mobile device with access to the Relay application to get started. Before getting started, you’ll need to update some of your settings in order to effectively use the Relay app.
Tap to flip the cards below to reveal the 3 settings you will need to check on your phone.
Topic 2. Photo verification tips and tricks
Next, let’s dive into photo verification a bit further. Doing this right will help to ensure secure and speedy yard access. Take a moment to familiarize yourself with these three easy guidelines.
Carrier Notifications
Great work! You now understand the basic requirements and expectations for account security and ID verification with Relay. But what about the types of notifications your carrier gets throughout your trip?
It’s simple, when you are hauling a load for Relay, your carrier will receive notifications when you:
These notifications keep your carrier informed and support quick resolution of any issues.
Summary
Once you have submitted your selfie in the Relay app as a part of identity verification, you’ll be asked to consent to the use of facial recognition technology. After consenting, you’ll start seeing requests for selfies in the Relay app prior to picking up a load. This will happen at each load pick-up. Relay will automatically match these selfies to what you provided during identity verification, using facial recognition technology.
These key takeaways will help ensure a smooth journey as you begin hauling loads.
In the next part of Relay Onboarding for Drivers, we’ll cover the essential steps for executing loads efficiently.
Note: This content focuses on Amazon site pick-ups and drop-offs. Please refer to site specific signage and posted procedures for clarification on expectations.
Pre-trip Checklist
Every trip begins with a series of tasks you need to accomplish before arriving on-site. Each trip will have its own unique preparations that might involve the load, the vehicle, and the equipment needed. This lesson will walk through the things that will occur in every trip. Let’s get started.
These simple high-level steps can help you prepare for your upcoming trip. We won’t go into details on the Pre-Trip Checklist (DVIR – Driver Vehicle Inspection Report), but you can learn more about this by checking out the Relay Learning Center(opens in a new tab) after you complete this course.
Now that the basics have been covered, it’s time to talk specifics. The next section will walk you through pre-registration. This is the process where the driver uses the Relay app to confirm their equipment prior to arriving on site. Ready to dive in?
Pre-trip Checklist
What is pre-registration? Why do we need it? Tap on each flashcard to learn more.
However, there are a few things you should be aware of when it comes to pre-registration:
Note: If drivers arrive too far ahead of the Scheduled Arrival Time (SAT) displayed in the app, they may not be able to access the yard. It’s best practice to arrive no more than 30 minutes ahead of the SAT. Any arrival after the SAT is considered late.
Preparing For A Trip
The most successful journeys start with a plan. We will explore together the steps you should take to prepare and get ready before each trip.
Maria just received this load assignment. Click on the markers to review the important details Maria should verify before proceeding.
Now review the conditions for the route. We recommend that drivers use Relay navigation for this.
Click on each tab to see the details of the route as shown in the Relay app, then review the preparations necessary for the condition.
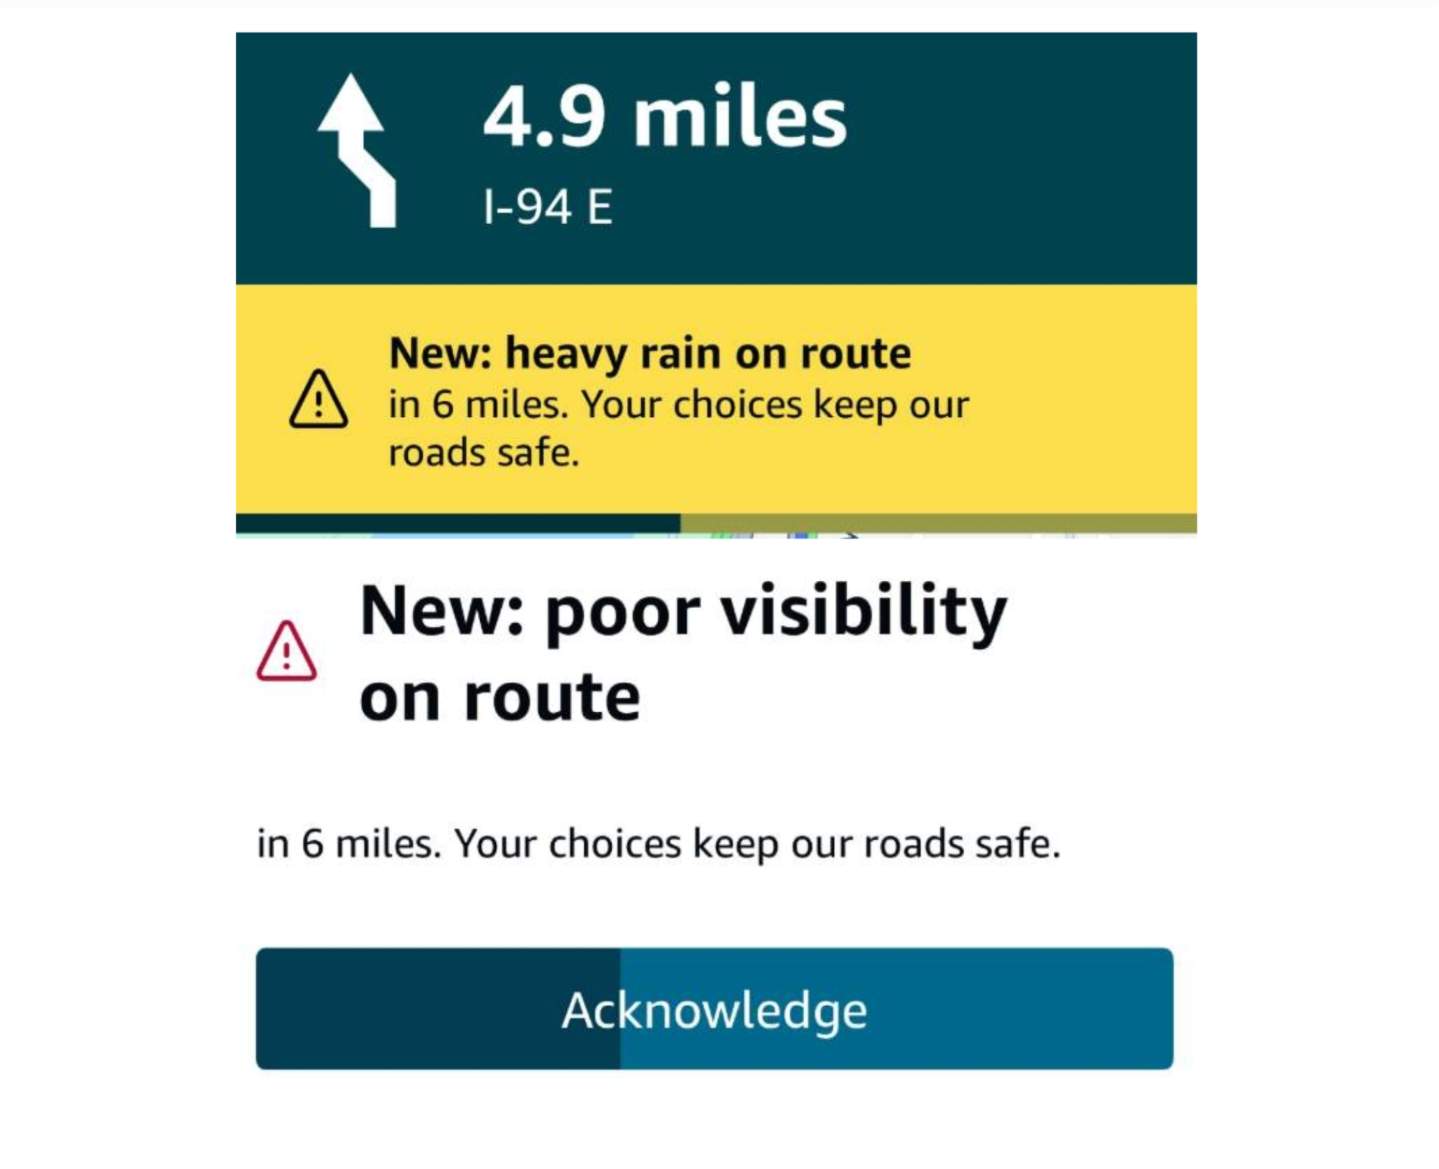
If any severe weather conditions are expected along your route, you will see a pop up in your Relay app and can prepare accordingly ahead of time.
Ensure windshield wipers are functioning properly and adjust your speed accordingly.
Leave extra travel time and stay alert for any updated weather information via the Relay app.
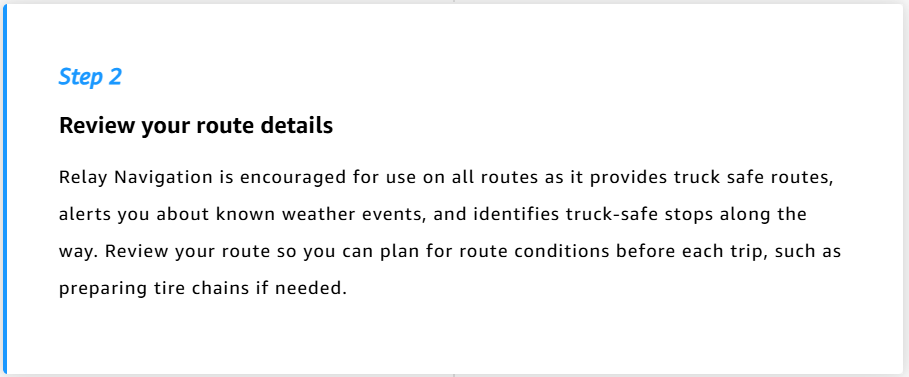
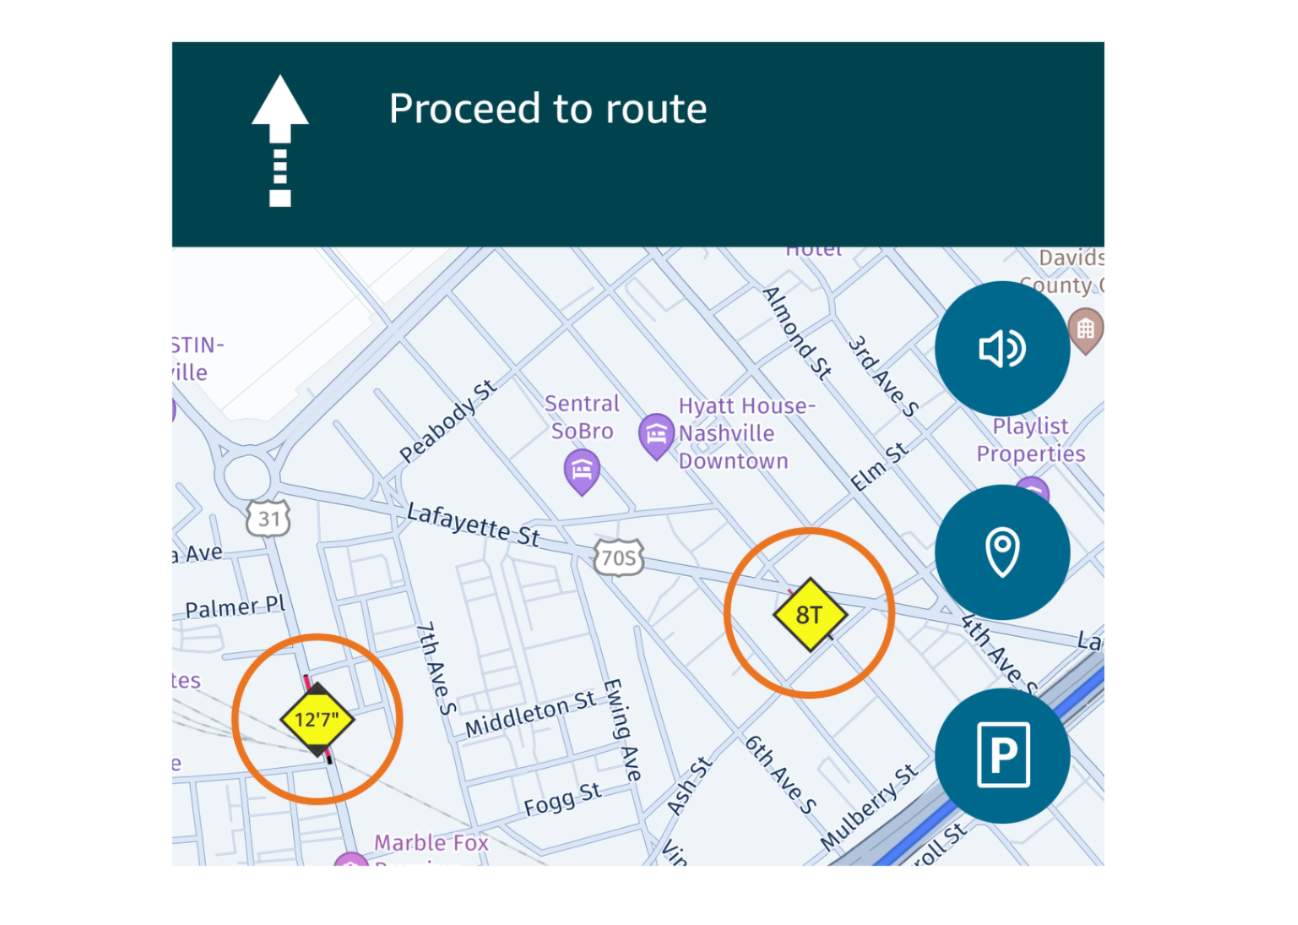
Know your vehicle’s height.
The Relay app recommends truck-friendly routes optimized for safety. You can also zoom in on the map within Relay to review detailed information about clearance and weight restrictions.
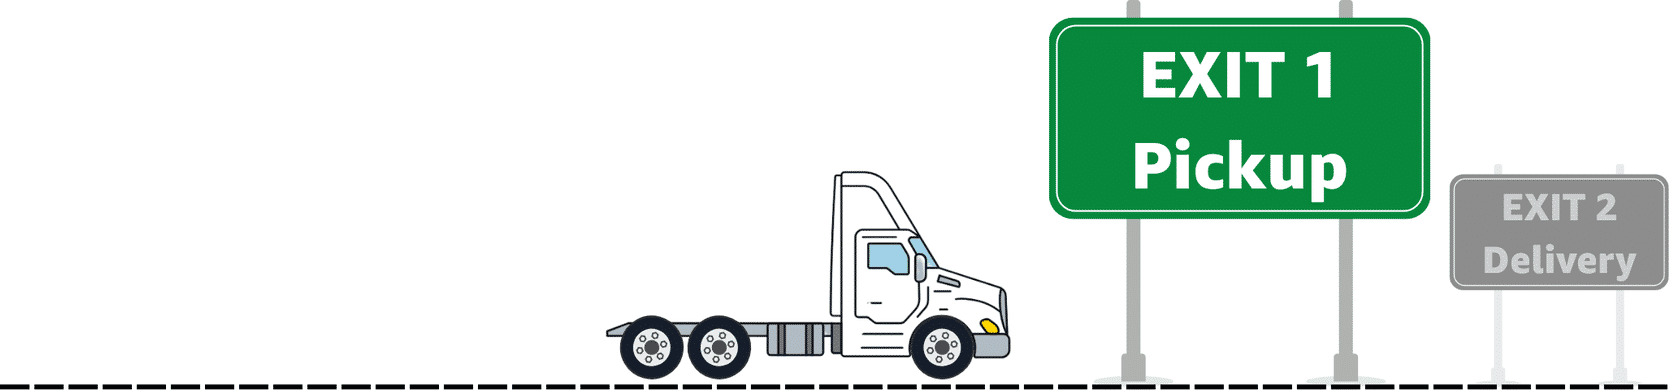
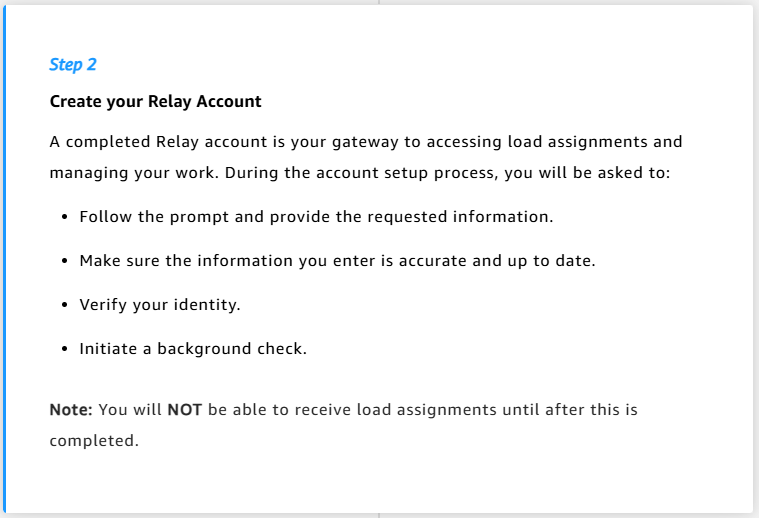
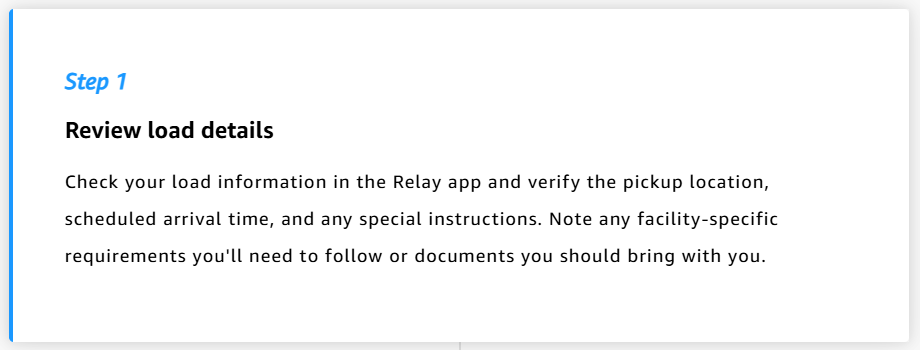
Maria needs to complete her final check. To help her do this click through each item to “complete” the checklist.
Next, you’ll learn about the Relay pickup and delivery process. There are two critical topics we’ll cover in this section:
The pickup process is separated out into four inter-connected sub-steps:
Arriving a few minutes early for your scheduled arrival time is recommended to allow time for check-in procedures. Plan to arrive at your pickup location no more than 30 minutes prior to your scheduled arrival time.
Once you arrive be sure to follow all posted signs and adhere to any speed limits in the yard. Have your documentation ready for check-in.

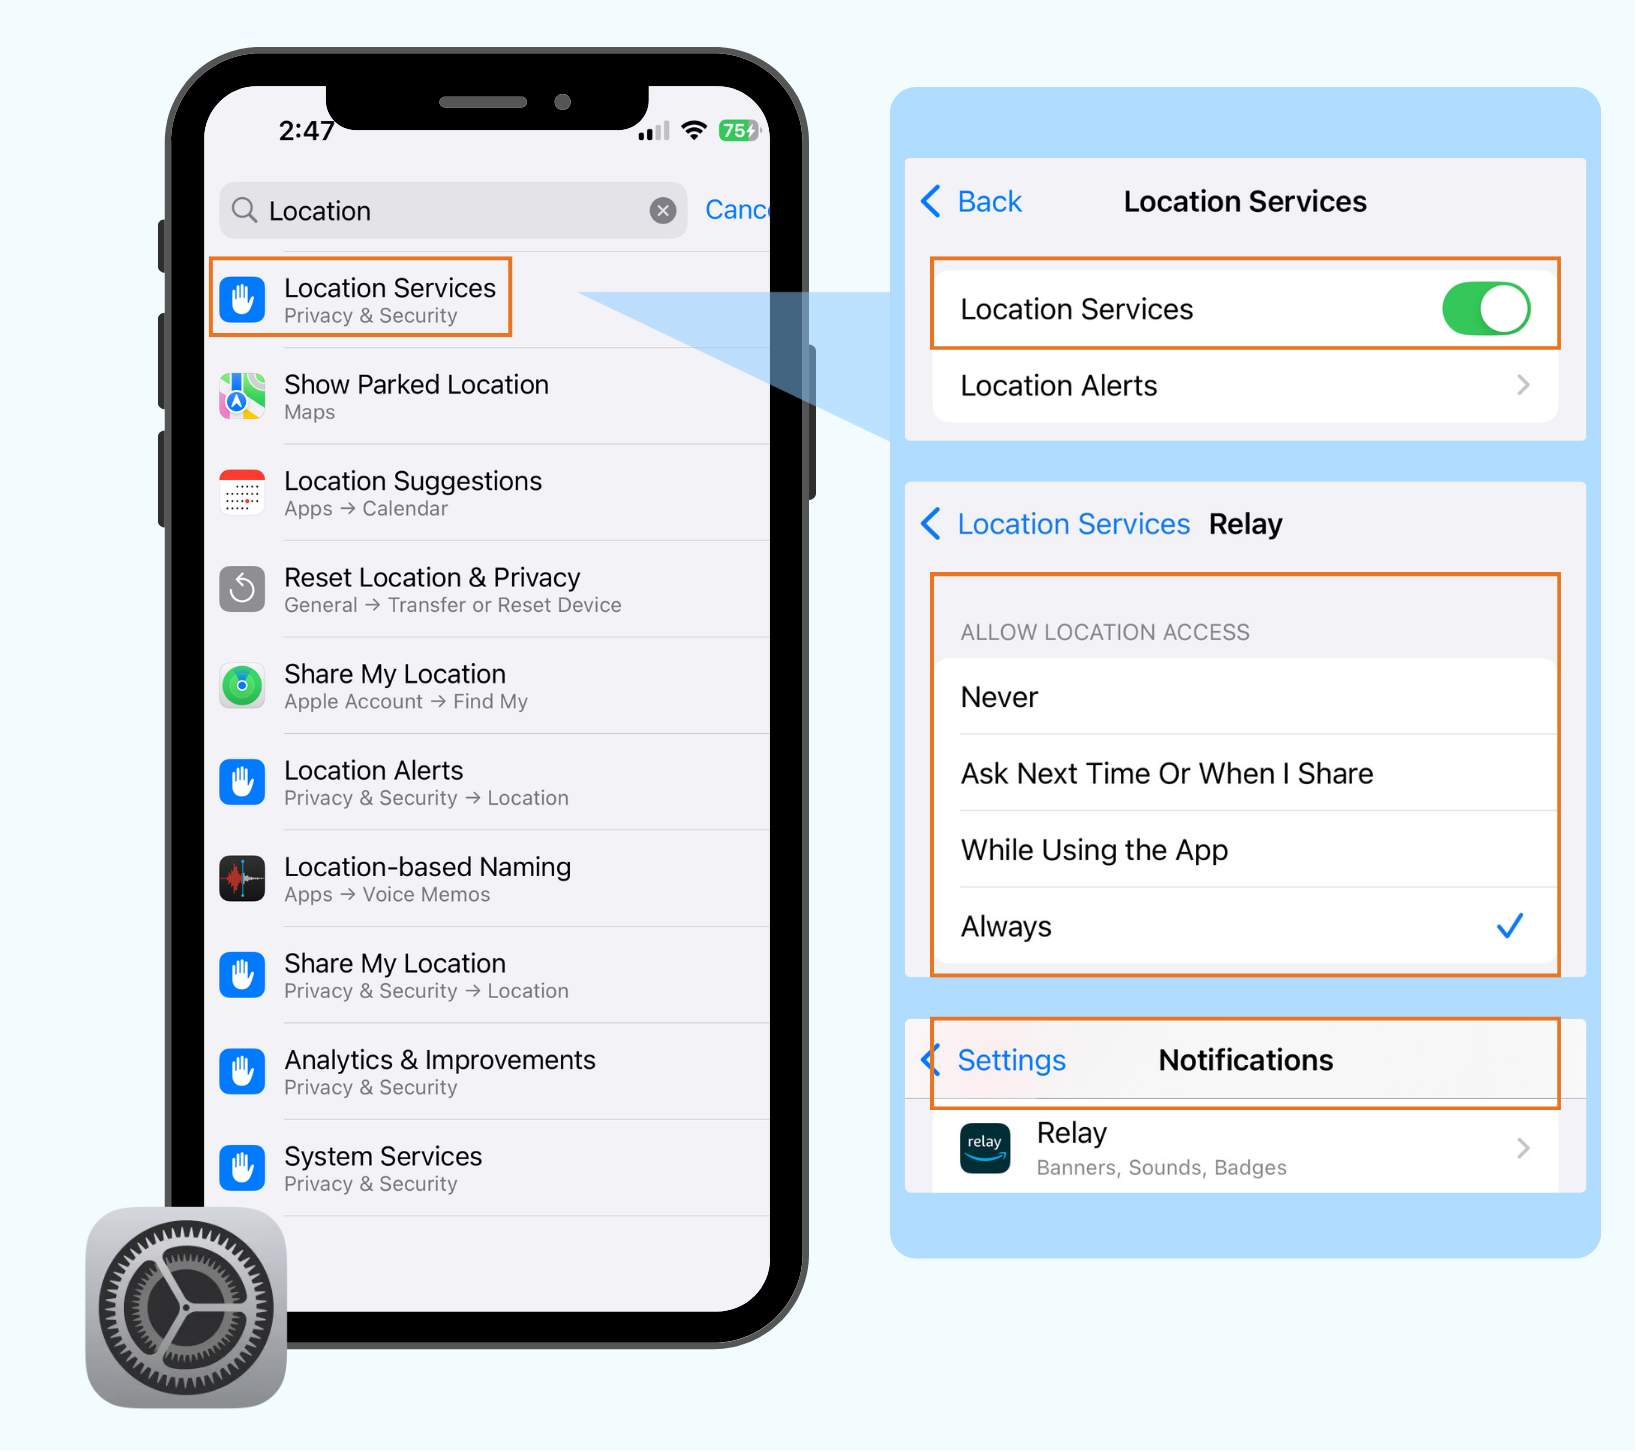
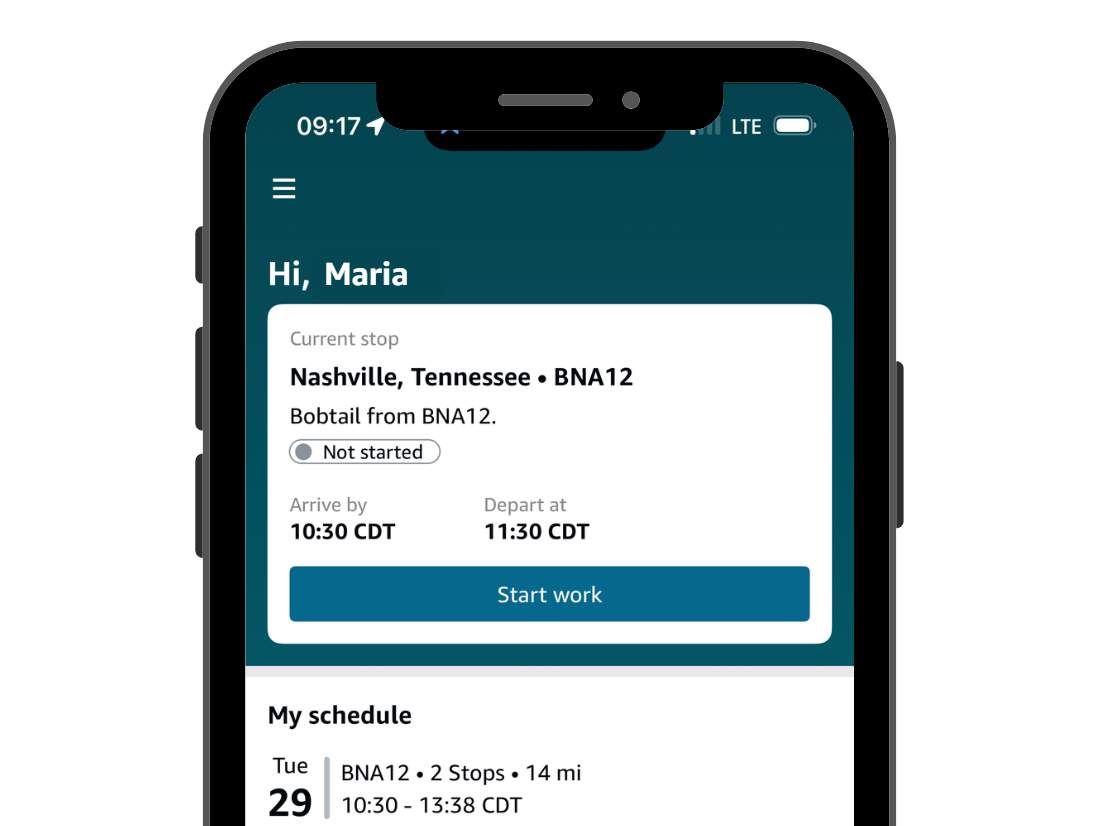
The Relay app uses your location to enable check-in:
Automatic detection within 500 meters/0.3 miles of facility.
App refreshes automatically when yard processes check-in.
Follow on-screen prompts for verification steps.
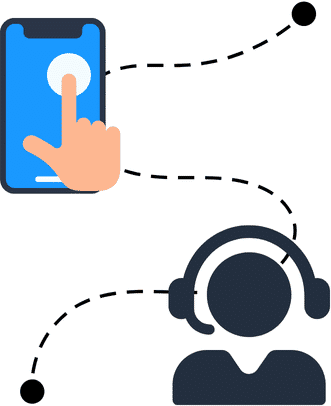
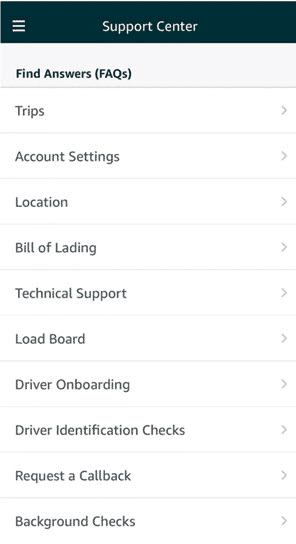
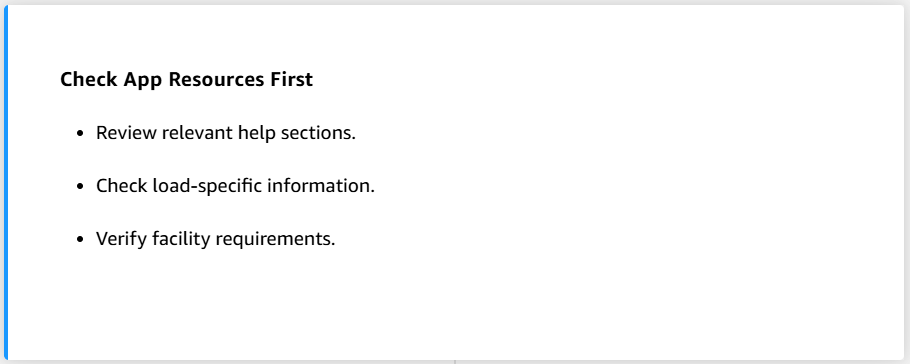
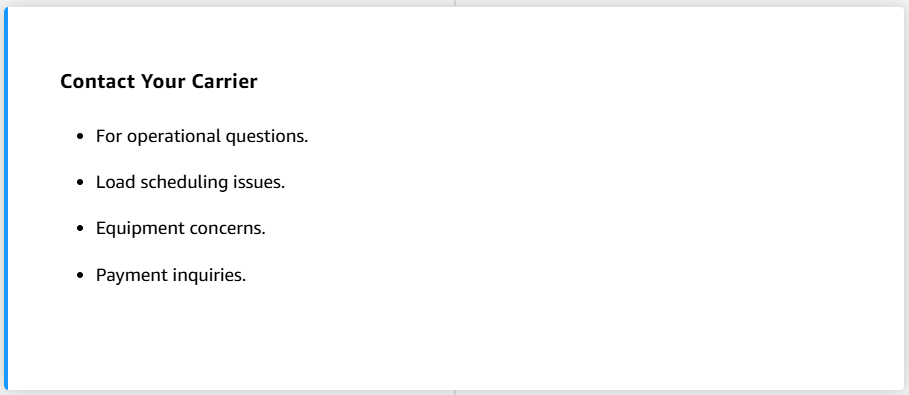
When standard check-in is not available, you may use manual check-in process if directed, follow facility personnel instructions, or contact support through proper channels if needed.
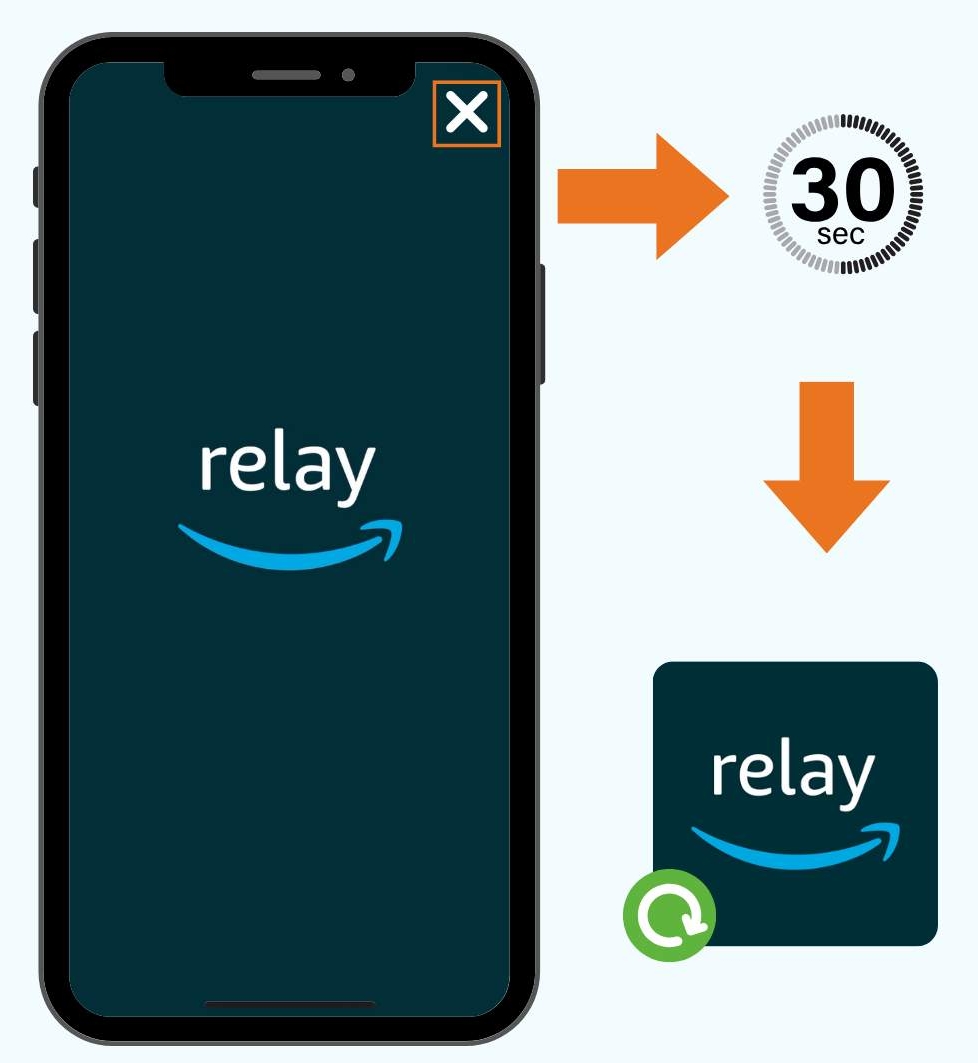
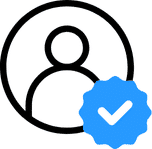
After check-in, the app will prompt you to complete a selfie check. This important step verifies your identity and confirms your presence at the pickup location.
For a successful selfie verification:
Stay within the facility area.
Find a well-lit location.
Ensure clear view of your face.
Remove sunglasses or face coverings.
Follow all on-screen prompts.
Important Notes:
You have three attempts to complete verification.
Verification must be completed before departing with the load.
Failed or incomplete verification may prevent yard exit with the load.
Multiple verification failures could impact load access.

After verification it’s time to get ready to get the load, secure it, and make sure it matches the assignment details. Before leaving the Yard, you should perform the following final checks:
Ensure the load is properly secured onto the truck.
Confirm all required documentation is completed and received.
Review your route and plan for conditions.
Complete any remaining app steps.
Follow exit procedures.
Check out at the gate upon departure.
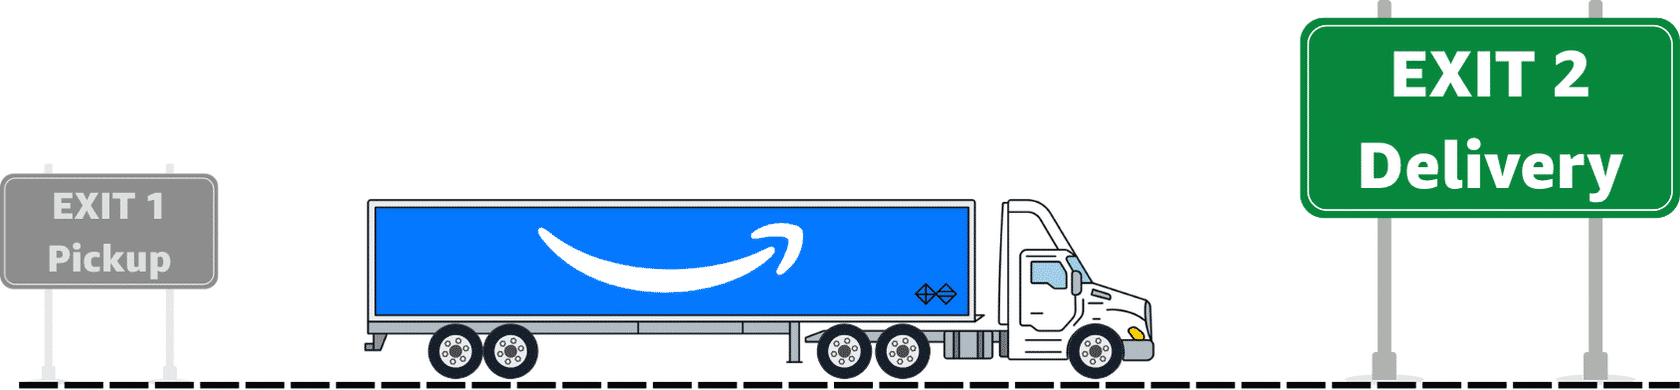
The delivery process is separated out into four inter-connected sub-steps:
After navigating to the correct delivery location using the Relay app, or the route provided, follow the facility’s entrance procedures. Be sure follow all posted signage, such as speed limits, and non-smoking area signs.

The app should automatically detect when you’re within the facility’s range, and you can complete the check-in process with facility staff, or using the gates if available. Once checked-in you’ll receive instructions for your dock or slip assignment, and unloading procedure.

When applicable, you’ll proceed to the designated unloading area, following all safety protocols listed on-site during the unloading process. Stay with your vehicle unless required not to. If you need assistance request it safely, and follow facility guidelines.

Finally, you’ll need to ensure all required documentation is signed and submitted for your load. Take clear photographs of the completed paper, verify all information is legible, and then submit them to the Relay app promptly. This will help you complete a successful delivery.
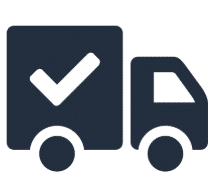
These five steps can help you once the load has been delivered to complete your trip:
Confirm – delivery completion in app.
Follow – Yard exit procedures.
Check – out at the gate at departure.
Complete – any remaining app tasks.
Maintain – documentation for your records.

While it doesn’t happen often, sometimes things change. Here, we list two potential scenarios and provide guidance on how to handle them. Contact support as/if needed.
If you’re curious to learn more about this, expand the boxes below accordingly.
If your load is reassigned:
Previous check-in may be reset.
New verification might be required.
Follow app prompts for next steps.
If you encounter system issues:
Try basic troubleshooting steps.
Use alternative check-in if available.
Follow facility personnel guidance.
Up until now we’ve alluded to the required documents that you’ll need for your trip, either during the Pickup or Delivery. Now it’s time to take a deeper look at what exactly these documents are, and how you’ll manage them properly.
The BOL document serves as the official record of your load. Sometimes it will be provided physically, other times you may receive an e-BOL (electronic version).
Always ensure:
All information is clearly visible in photos.
Required signatures are present.
Date and time are included.
Load details match your assignment. If there is a discrepancy, please contact ROC.
A POD document confirms successful delivery.
Remember to:
Get clear signature from receiving facility.
Note any exceptions or issues.
Keep copy for your records.
Submit through the Relay app promptly.
Excellent work! You now understand the following at a high-level:
The topic of Yard safety is very important. Per Relay policy, following Yard safety rules is required for accessing Amazon facilities. Violations may result in notifications to the driver and carrier to improve performance. However, serious or repeated issues could lead to temporary or permanent loss of Yard access, impacting your ability to haul loads.
Amazon’s Yard access policies are designed to maintain a safe, efficient, and professional environment for all. These policies, outlined in the Relay Program Policies and Yard Access Guidelines, cover safety practices, professional conduct, and operational standards.
Everyone that enters an Amazon Yard is expected to follow Yard Rules when they enter and Amazon Yard:
Watch the video below to begin exploring the safety practices you’ll need to know about while working in the Yard.
In the video above you learned about many of the safety essentials while working in Amazon Yards. Let’s recap some important ones.
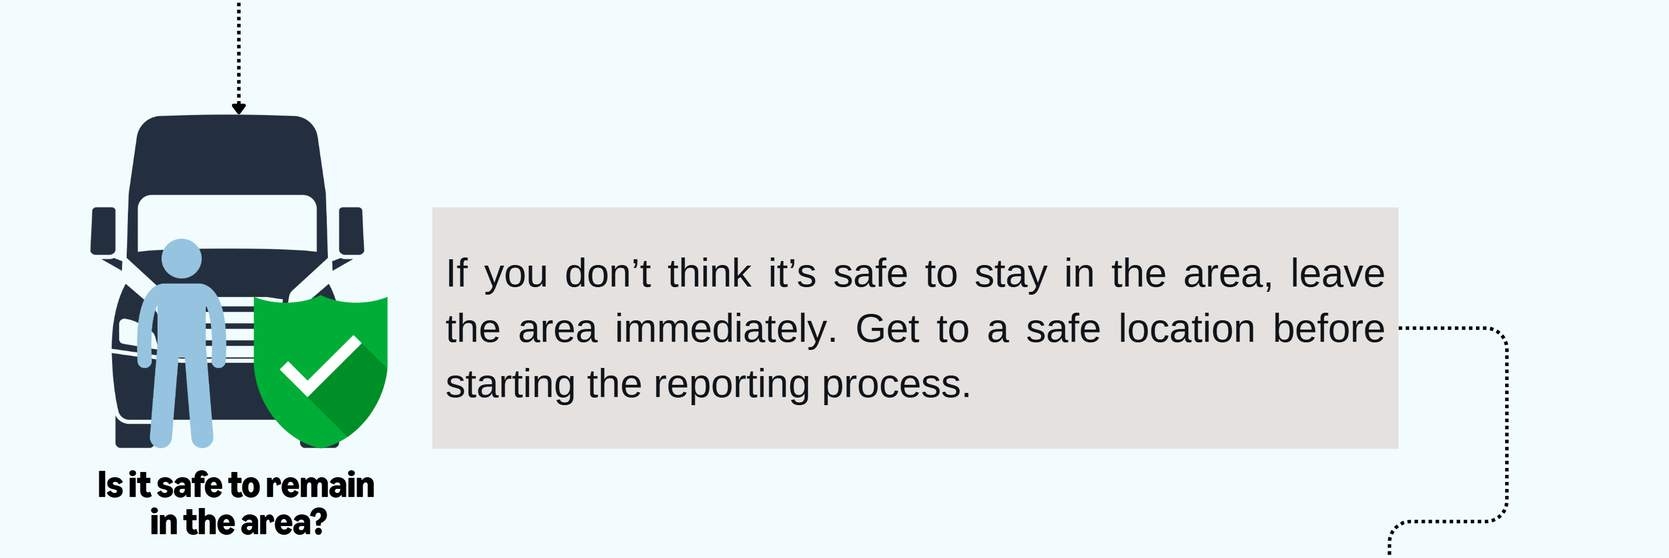
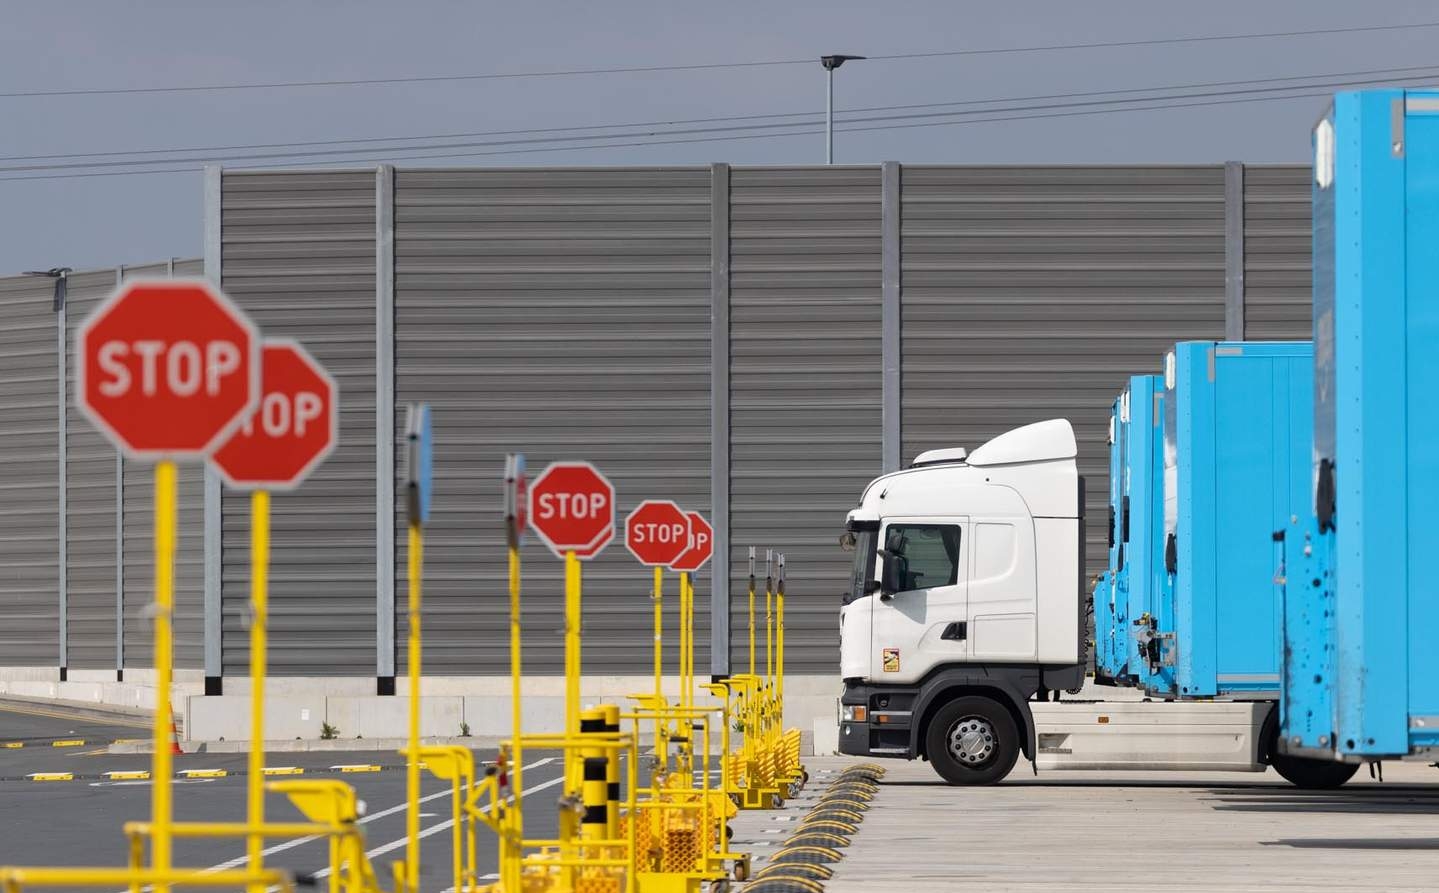
In Amazon Yards, you’ll see signage for everything from speed limits to safe walkway areas. You’ll need to follow the instructions on these signs to remain safe in these areas as required by Relay policy. These practices ensure that you can safely enter and exit the Yards.

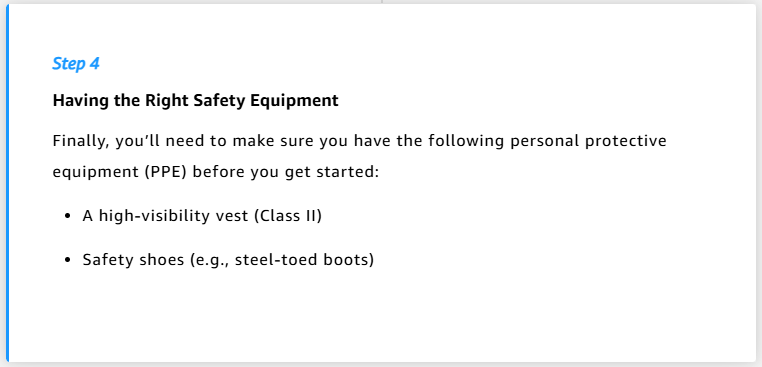
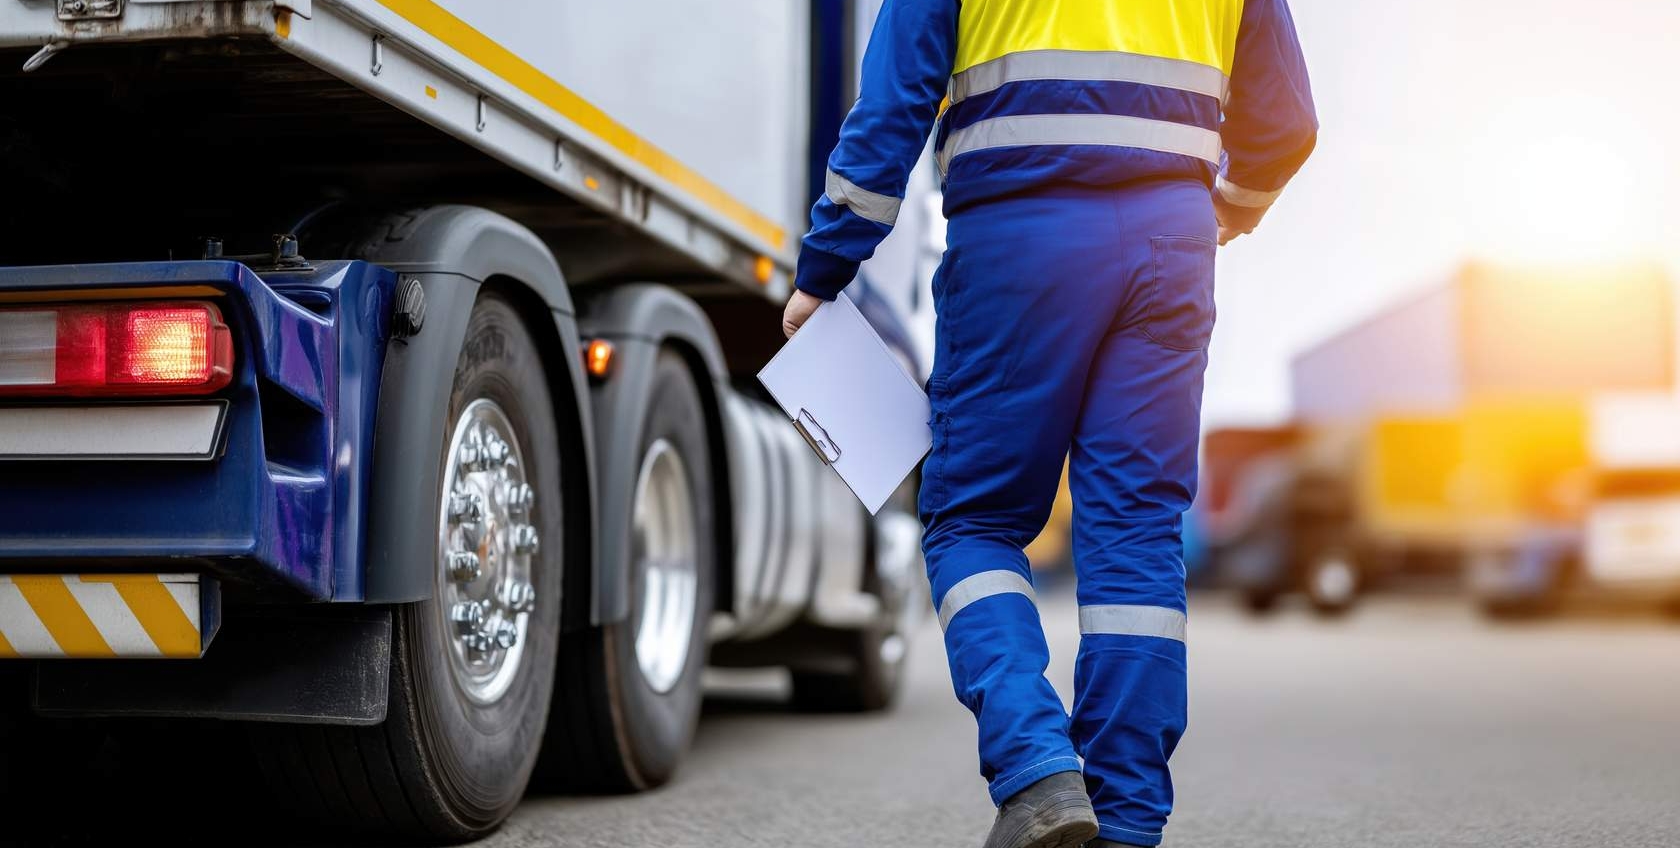
Personal Protective Equipment (PPE) is required when you are outside of your vehicle in any Amazon Yard. To keep yourself safe, follow these simple safety tips while outside of your vehicle and in the Yard:
Wear a Class II high-visibility vest at all times.
Use safety shoes.
Keep loose clothing secured.
Remove headphones or earbuds.

While operating in the Amazon Yard, situational awareness is key for maintaining a high safety standard. Here are a few simple tips that can help you stay aware of your surroundings and reduce the likelihood of incidents.
Stay alert and watch for pedestrians and other vehicles.
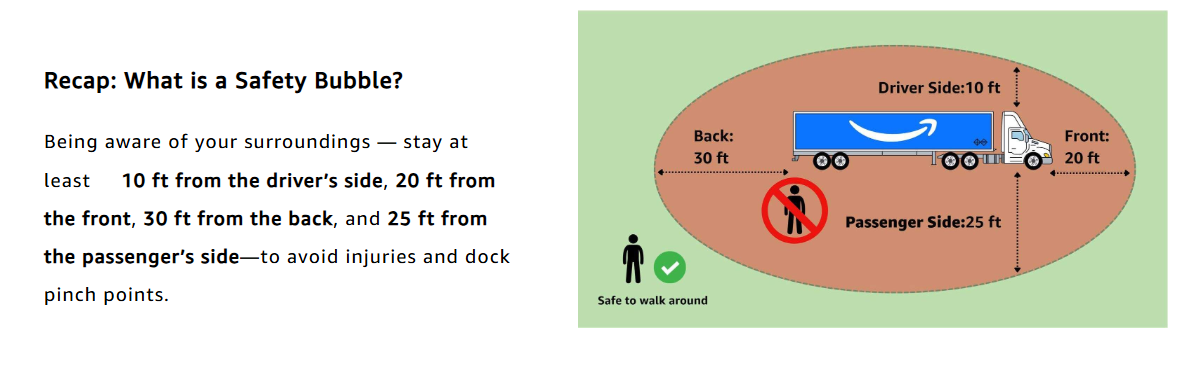
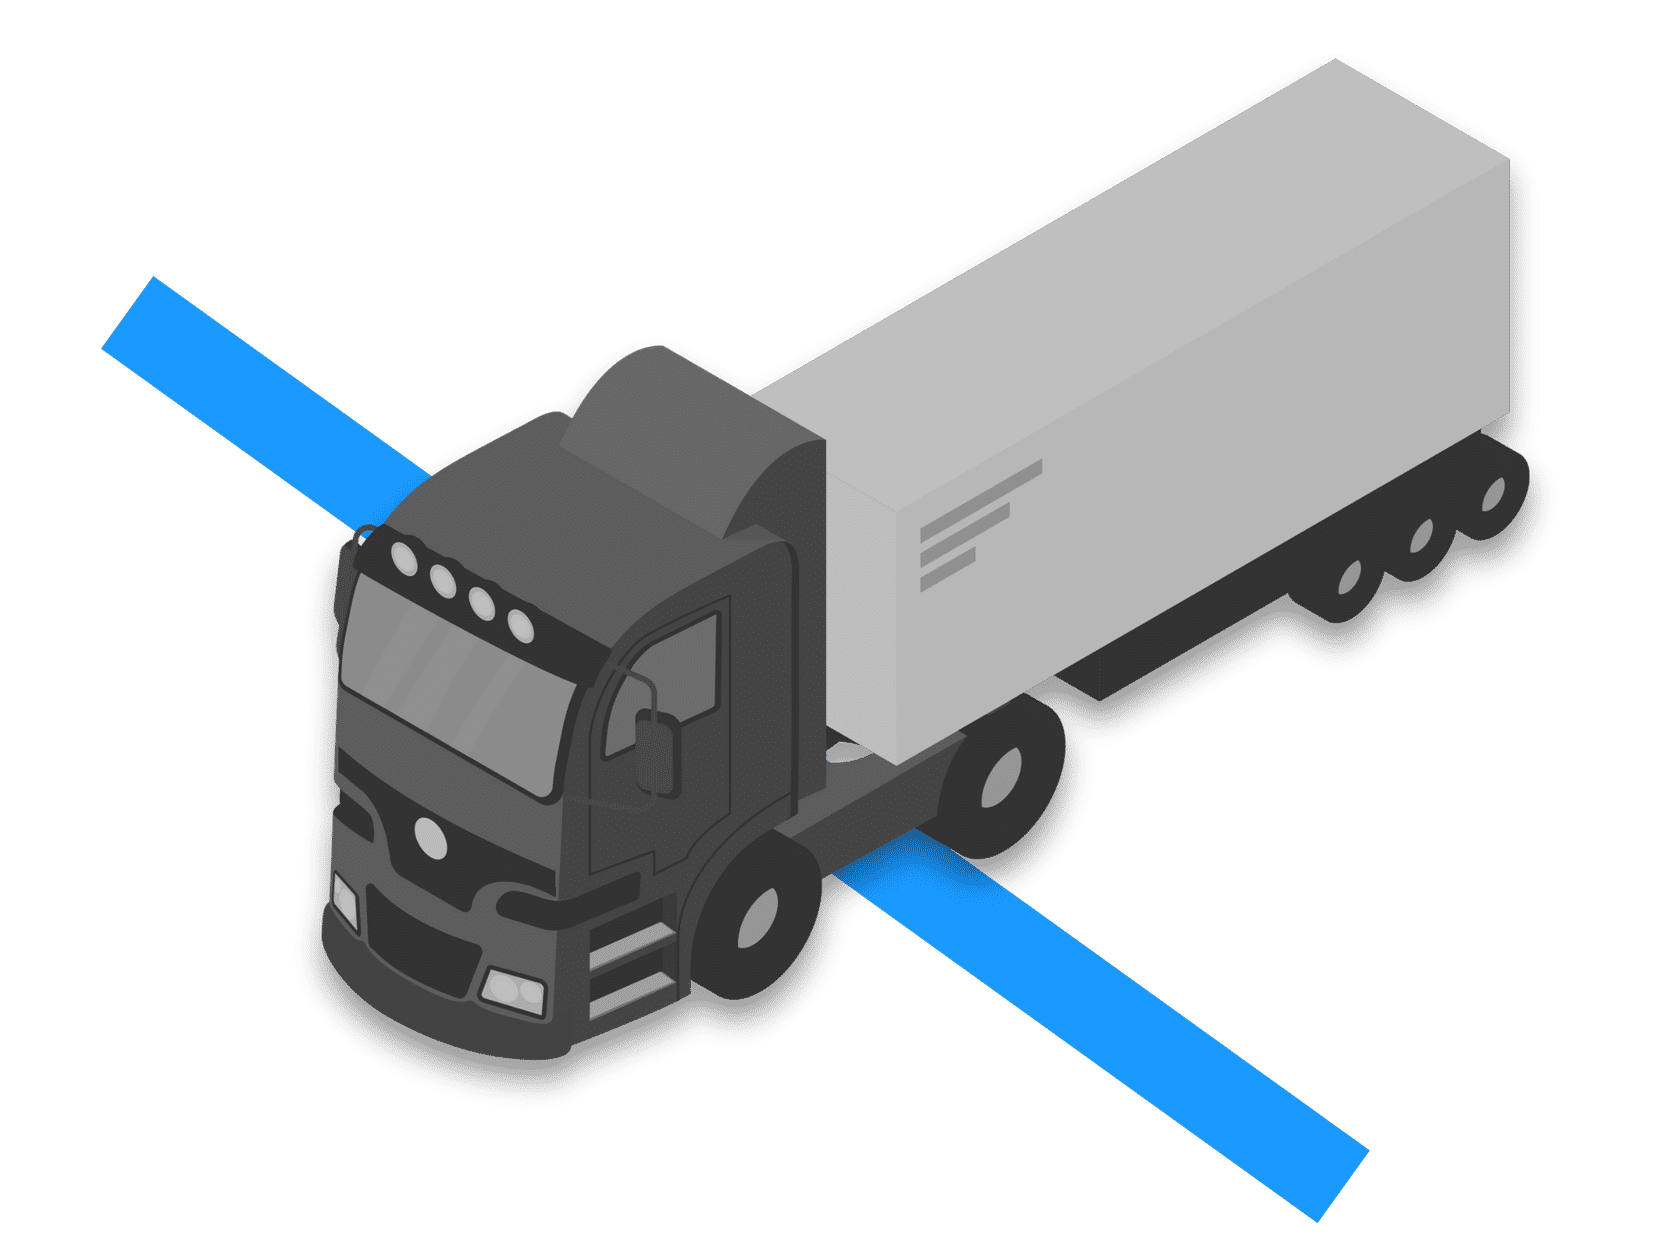
Maintain safe distances from other vehicles utilizing the Safety Bubble.
Follow all posted signs and markings.
Remain with your vehicle unless necessary.
Do not enter slips next to active parking slips, where people are present such as yard staff or other drivers.

This section provides detailed instructions on how to use Land-on-Blue (LoB) as a visual reference to park trailers correctly in perimeter slips, back-to-back slips, and wall slips within an Amazon Yard.
The blue line serves as the visual reference point used to guide drivers to help align the front of the trailer while parking without having to exit the truck. This improves driver experience by reducing the need to get out of the truck to ensure accurate parking. While also having the potential to eliminate safety hazards that can be caused due to exiting and boarding the truck numerous times.
Carriers use the insights gathered here to look for opportunities to provide coaching to their drivers.
Note: This does not apply to docking trailers at dock doors.
Click the arrow below to read through the steps.
Finally, if a safety incident occurs in the Yard, it must be reported. Even minor incidents require reporting. This includes both injuries and vehicular accidents. Reporting incidents promptly ensures that you’ll continue to have access to Amazon Yards.
Proper incident reporting plays a vital role in Yard safety and your success hauling loads.
Note: When incidents are reported promptly, Amazon can address safety concerns and help prevent similar situations. In addition, reporting incidents immediately often leads to opportunities for process improvement rather than penalties. However, failing to report incidents puts safety at risk and may result in loss of Yard access.
Next, let’s explore the essential steps for reporting incidents effectively at a high level. We will cover this in two steps:
You should report ANY incident, no matter how minor, including:
Vehicle collisions.
Property damage.
Near-misses.
Injuries or health emergencies.
Hazardous conditions.
Security concerns.
Ensure immediate safety first. Please call 911 if it’s an emergency.
Safely notify Yard personnel straightaway.
Use the “Click to call back” feature in the Relay app to report the incident.
Contact your carrier dispatch.
Cooperate with any investigation procedures.
In the next section you will explore the reporting process
Above you learned when and how to report. Now you’ll learn how this all comes together through the following infographic.
When an incident occurs in the Yard, there are a lot of decisions you’ll need to make to navigate it properly. The flowchart below outlines best practices for reporting an incident.

Below is the information you should be prepared to provide in the report.
Tap on each card to reveal the follow-up procedures and your responsibilities after submitting the initial report.
Follow Signs and Signals:
Stop at all stop signs – no rolling stops.
Adhere to posted Yard speed limits.
Obey traffic flow patterns.
Follow painted ground markings.
Respect dock door signals.
Adhere to designated parking areas.
Some facilities use automated check-in while others require manual processes.
Always follow posted instructions.
Ask facility personnel when unsure.
When standard systems are unavailable:
Follow facility personnel directions.
Use manual check-in processes if needed.
Maintain all safety protocols.
Document any special instructions.
And remember… Your Yard access depends on:
Great work! You should now understand the following essential Yard safety topics:
Remember: Safety is a shared responsibility. By following these guidelines, you contribute to efficient operations and help to maintain your access to Amazon facilities.
We’ve mentioned support a couple of times throughout this course. In the last section of this course, we’ll provide information on how to access that support using the Relay app.
You’re almost at your destination.
Having the right information at the right time keeps you moving efficiently and helps prevent delays. While most situations can be handled through self-service resources, it’s important to know when and how to seek additional support. Understanding these resources and when to use them saves you time, reduces frustration, and helps maintain smooth operations.
The Relay app provides multiple ways to find answers and get help:
Quick self-service options for common questions
Clear paths for urgent situations
Direct access to support when needed
We will start with the self-service options available in the App’s Support Center. The Relay app provides several ways to find answers and resolve common situations on your own. Learning to use these tools helps you save time and solve issues quickly.
Identifying whether a situation is urgent helps you choose the right support channel and get the fastest appropriate response. Review the two tabs below to learn more.
These can typically be resolved through self-service options:
General questions about procedures.
Documentation requirements.
Facility information.
Future load details.
Payment status inquiries.
These require immediate support contact:
Safety concerns.
Load rejection at the facility.
System issues preventing load execution.
Facility access problems.
Mechanical issues affecting delivery.
When self-service options don’t resolve your issue, you can select the appropriate support options for additional help from the following:
If you encounter technical issues with the app, you can usually resolve them by following the steps below.
#1 Restarting the app.
#2 Check your phone settings.
#3 Restart your device.
Finally, understanding some basic error messages within the app may help you take the right action. Here are a few error messages you may encounter and some simple steps to correct the issue.
Great work! You now have the tools and knowledge to handle various situations that may arise while hauling loads. Let’s review what you’ve learned:
Remember: Safety is number one. Seek immediate support for urgent safety or operational concerns.
Next, you’ll take a brief quiz before completing this course. Good luck!