This course overviews the steps drivers should take to inspect trailer tires, brakes, mud flaps and trailer skirts, in yards, before pulling the trailers.
This course will take approximately 10 minutes to complete.
This course is mobile friendly. You can take it on your phone or on a computer. Select the cards below for tips on taking this course on your phone.
This course overviews the steps drivers should take in yards before pulling the trailers.
It’s important to inspect:
AZNG trailers are equipped with an Automatic Tire Inflation System (ATIS) designed to monitor tire inflation.
Note: Not all AZNG trailers have ATIS, but the ones that do also have an accompanying alert light.
Let’s review the critical tire inspection steps:
Check all outer tires to ensure there are 2 ATIS lines present and connected properly and aren’t missing or snapped off.
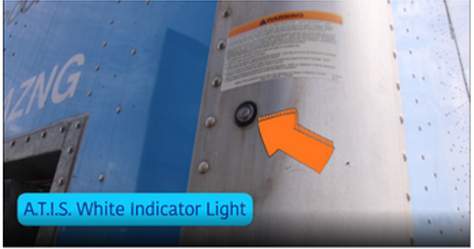
Check the white indicator light located in the front of the trailer to ensure it is not illuminated.
The ATIS uses the air pressure built up in the trailer to inflate trailer tires as necessary. If the trailer does not have an adequate amount of air pressure to fill under-inflated trailer tires, the white light may remain on until the trailer air pressure system is filled.
This happens when the airlines from the tractor are connected to trailer and when BOTH air brakes are released. Usually this process only takes around 15-30 seconds.
Verify the ATIS light is not illuminated after reaching the destination and prior to uncoupling/disconnecting air lines.
If the white light remains illuminated for an excessive amount of time, after this process, alert a yard associate or contact ROC.

Visually inspect all tires (including inner tires) to ensure they have sufficient tread and tires are not flat. For trailers not equipped with ATIS., check all tires (including inner tires) to ensure they are not flat. A minimum PSI of 90 PSI required on Amazon-branded trailers. If tire pressure is below 90 PSI, alert a yard associate immediately or contact ROC.
There should be no exposed body ply or belt material through the sidewall or tread, tread or sidewall separation, audible leaks, or cuts where the ply/belt material is exposed. Additionally, there should be no bulges, visible cracking/dry-rot, low tread and punctures in tires.
Confirm there are no projectile (bolt seals, nails, etc) punctures in trailer tires.
Confirm that the tires/rims are in good condition and there are no visible oil leaks in the rim of the tire.
Here are examples of tire defects that you should keep an eye out for during an inspection.
The integrity of the mudflaps should be verified before and after every load.
Press each tab to review the steps to inspect mud flaps and trailer skirts.
Check mud flaps to ensure they’re not missing or broken.
Check mud flaps to ensure they are secure on the trailer.
Check mud flaps to ensure the brackets are not bent or damaged.
Ensure all DOT tape is present, clearly visible and spans the length of the trailer.
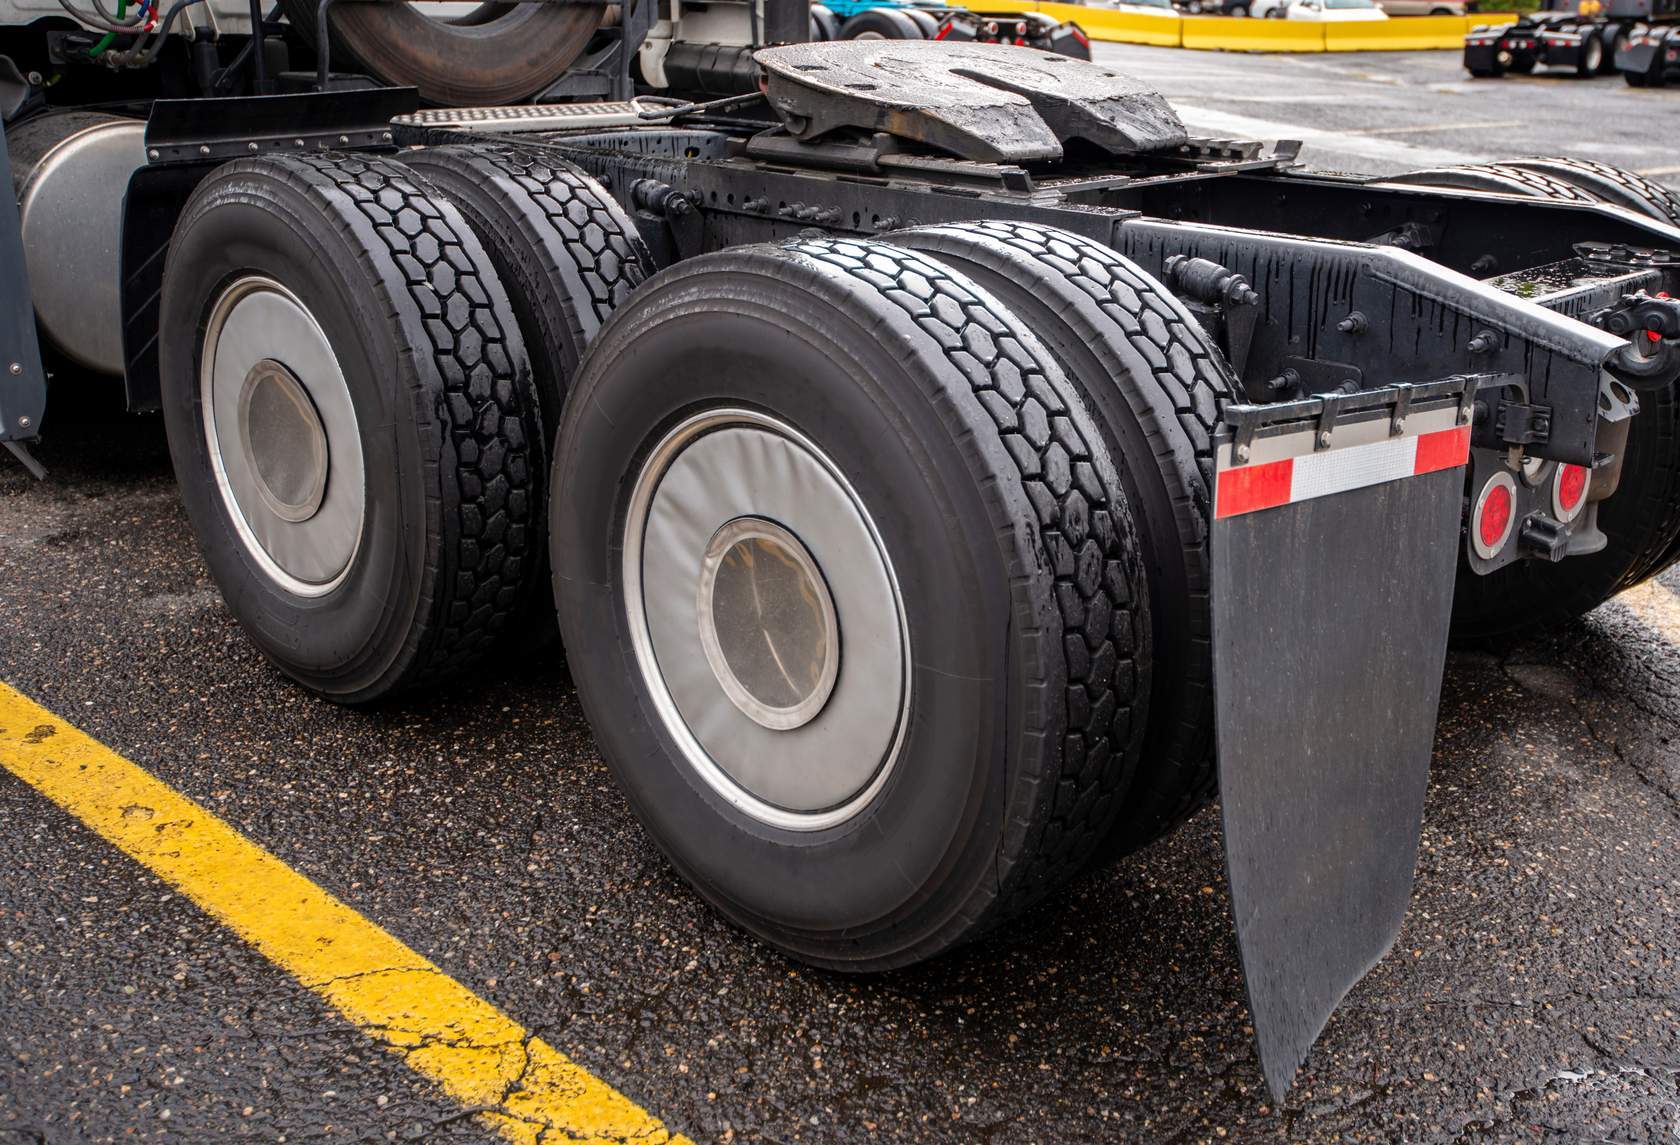
Check the trailer skirt, if present, to ensure it is properly mounted and secured.
If trailer skirt is present, perform a visual check behind the skirt to ensure air lines (or other components) are not dragging the ground, or in danger of being damaged by axle movement.
Tandem position can make lines look “low” but there is no risk if they will not catch on anything or if the tandems are adjusted the lines will not be hanging.

Check each box as you read. Here are examples of mud flap defects that you should keep an eye out for during an inspection:
Trailer skirt defects can be:
NOTE: Carriers should be mindful of parking blocks when parking their trailer to reduce mudflap detachment.
Always be aware of your surroundings and remain alert for pedestrians when your tractor and trailer brakes are released.
Here are examples of brake defects that you should keep an eye out for during an inspection:
Check each box as you read. Here are examples of mud flap defects that you should keep an eye out for during an inspection: